Thursday, March 15, 2012

Building Popsicle Stick Airplanes, examples


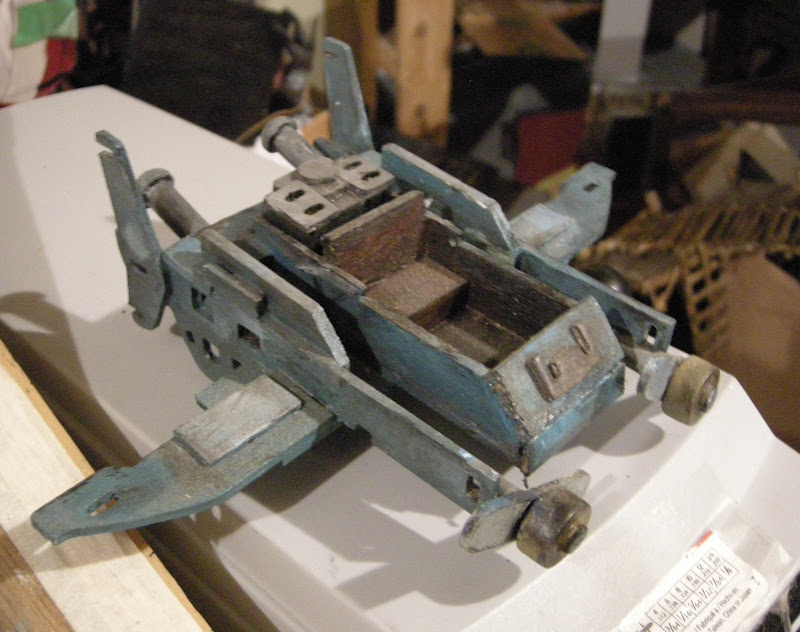
Here are some examples of Popsicle stick airplanes that I've built, I'm not sure if the airplane in the first picture is finished or not, it looks a little too simple at the front end. The second photo has more of an antique feel to it, the third looks fast and kind of dangerous to fly, the fourth is definitely my favourite of them all with the two propellors and the fifth is very modern looking for Any How Town but does show how planes are usually used in the world of AHT. Planes are more or less single engine, single passenger flying bombs, this is important for later on in the book series. So there you go a few examples to check out to help you when you're building your own planes.
A few posts ago I mentioned the wooden bits that come with prestretched canvasses, I use them all kinds of different ways for the builds, you can scroll through the blog and spot them on every kind of vehicle, I've snapped of the ends and used them to build stairs and also as large cinder block looking bricks and the best thing is that you get a whole bunch of them when you purchase a set of five prestretched canvases like the sell at your local DeSerre's art store.
If you go over to my other blog "the mad craft shoppe" you can check out my paintings and even purchase one to help fund the continued writing of this series of books.
In the writing process I'm currently on the third/fourth pass through Book One and hope to be finished and working on query letters by the end of March. Book Two is in really good shape now and I'll be moving onto it shortly.
A.Shay Hahn

Tuesday, March 13, 2012

Popsicle Stick Buildings "Fishing Shack" More Steps


I guess I'll call this a "Stepped Dock" for the sake of this "set" but I built a couple of these stepped platforms to have on hand to add levels to different sets. Levels are really important, I want characters featured in these pics to be above, under, coming from inside buildings etc. I don't want them to look flat so I built these.
If you look at the construction in the first photo you can see that each step is four wooden cubes and then I made a square out of popsicle sticks and then used popsicle sticks for the boards on each step.
When placing the popsicle sticks put a little space between each one to give it depth.
I basecoated the steps with black/brown and when it was ALMOST dry I went over it with Raw Sienna, pulling the brush up each one of the sticks individually to create some woodgrain, this is very easy to do, don't be intimidated.
The final photo here shows the three pieces together, I haven't attached them to each other, they take up less room separately and can also be used for other things. But you know what ? I think this is still a little dull looking so I'm going to add some more things to it to really give a maritime feel.
A.Shay Hahn

Popsicle Stick Buildings "Fishing Shack" Next Steps


Here we are at the next steps of building our Fishing Shack, I basecoated with a black/blue mix to give a steel base colour and then started adding a touch of white each time I went in to drybrush. When I got to a point that I thought the shack looked like the paint was flaking off after years of inclement weather I went in and just added some touches of rust (burnt sienna & burnt umber mix) always wait until the piece is dry before adding reds or it will blen and go pink on you which is frutrating and you may have to do some parts over again from the basecoat stage.
Next I built these four cube pillars and covered the base with odds and bits from the bottom of my "Box of Bits", once the glue was dry and I was sure it was secure I basecoated with a black/brown mix, let that dry and then went over the cubes with some of the leftover colour from the fishing shack to make concrete blocks. Then I took some raw sienna and just highlighted a bunch of the bits to make them pop.
The Fishing Shack is coming along, but it still needs some touch ups.

A.Shay Hahn
send us an email, I'd love to know how you got to this blog.

Monday, March 12, 2012

Build Your Own Fantastic Beasts


Here is a quick way to make your own Fantastic Beasts, this is the THIRD creature building tutorial, the first was Cliff Jumping Lizards, the second was the Gobblers (you'll just have to explore this blog to find them) and here are some little demon pets. This is pretty simple and straightforward but I never seem to get tired of doing it.
STEP ONE - Ask an adult if you're too young to do this, get your Leatherman out and saw the heads of the baby cheetahs, also saw the heads off of the pterodactyls.
STEP TWO- Get your drill and put a hole in the body and in the neck of each piece.
STEP THREE- Take the small dowel and break off one piece per beast, it doesn't have to be more than about an inch long, maybe smaller.
STEP FOUR-Take your TITAN All purpose glue and fill the hole in the body, insert the small dowel piece, put some more glue in the neck hole and then attach.
STEP FIVE- Put them aside to dry, when dry you can add more glue to connect the head and body seamlessly.
Isn't this just the best?
A.Shay Hahn

Popsicle Stick Buildings "Fishing Shack" First Steps


I'm doing some writing in Book Two right now, trying to get back in the swing of working eight hours a day on the series. I took last week off to do some commissioned work (see "the mad craft shoppe" blog) and found that it was harder to get back into the rewrites in Book One than I first thought it would be. I decided I'd warm up each morning by writing here first and then going into the Any How Town book series after.
So above is a very simple building, easy constructed but dull. I'd asked over on facebook at my page, "Andrew Shay Hahn "the mad craft shoppe" for some ideas for new builds, my good friend M.Thompson suggested a "a love shack" and that got me thinking that since I bought those fish on the weekend and the water figures so prominently in the AHT stories that I'd built a fishing shack.
Like I said the first pic is pretty dull looking but if you add these coffee stirrers to it when it's ready for paint the piece will have more depth. Now this guy is ready for a basecoat and then some highlighting stay tuned to watch it evolve.
A.Shay Hahn


Sunday, March 11, 2012

Building Popsicle Stick Vehicles, Airplanes!

A couple of posts ago I'd put up the tutorial about how to build a truck or a car with bits of wood, the hardest thing to secure if you don't want to spend too much morney are wheels. Wooden wheels are hard to come by an easy way to make them is to buy a large dowel and use a chop saw to cut it up into segments, but not everyone has access to a chop saw.
What I propose you do instead of building four, three or even two wheeled  vehicles is to build airplanes ! Building airplanes is just as cool as building wheeled vehicles. In the Any How Town stories airplanes do not figure very prominently and I have built a few but just for my own amusement and I promise I'll get some photos up later this week of same airplanes that I've made.
have a sunny Sunday,
A.Shay Hahn


Saturday, March 10, 2012

The Heads of Flying Beasties


I also picked up these wonderful flying beasties yesterday, I think I'll have to go back for more of them as I have a few good ideas that I'd like to try with their heads. Photos One and Three are particularly exciting for me, there's a very scary event that is scheduled to go into the Any How Town books and I haven't quite placed which book the story is going into, either Book Four or Five and these heads will really help with the creature design for that story.
A.Shay Hahn

Friday, March 9, 2012

GIANT FISH!


Needed to get out of the house today for some air and while on my walkabout I found these bad boys. Fishing is important in Any How Town, it's how most folks make their livelihood so I just had to buy these guys. They're pretty big in comparison to the figures I use (Star Wars size, whatever that is) so when I do a set piece you'll get to see just how big.
I'll be returning to the tutorials soon, don't you worry. Send us your pics of popsicle stick sets and vehicles and we'll post them here.
Also head over to "the mad craft shoppe" blog to see paintings that are hanging at the Wilson 96 and the new additions to the Press Club wall. (see links)
This blog should really be more popular.
A.Shay Hahn

Thursday, March 8, 2012

Building Popsicle Stick Vehicles EXAMPLES


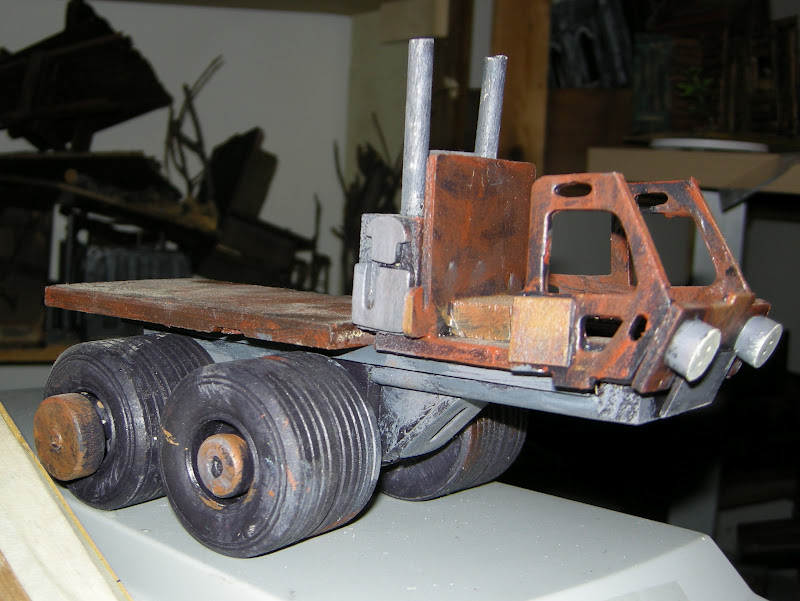
Here are some examples of other vehicles that I've built for Any How Town, they all follow the same basic principles that I outlined in the past tutorial "Building Popsicle Stick Vehicles". If you look closely at each piece you can see that they really are just variations on the simple "wheels with dowels chassis". The only differences are the size of the center piece of wood and the placement of the wheels. As I said below I can't stress how important it is to take advantage of buying wheels when you see them for cheap.

"But Shay, what if I can't find any wheels ? What if the wheels are too expensive ?". Well, fear not we'll deal with that problem in the next few posts.
have a great day,
A.Shay Hahn

Wednesday, March 7, 2012

Building Popsicle Stick Vehicles STEP TWO - FIVE ? SIX ?

STEP TWO
 So here is the "Dry fit" I was talking about in the last post, I added another piece at the back for the cab of the truck that I'm building. I'm pretty happy with the spacing of the wheels. Sometimes you have to trim down your dowels, but when the wheels are this big, forget about it and keep going
                                                                              STEP THREE
From your box of bits try and find some small circular pieces for hubcaps, this will keep the wheels from falling off. Then drill with 1/4" bit a hole in the center and then apply glue. Let it dry and have a look for some pieces to use for an engine.
                                                                             STEP FOUR
Here's the front of the truck and some cubes and other pieces that I've assembled to make the engine. I always make the engine visible that's my thing, feel free to do whatever you like.
                                     I added another piece at the front here so a driver can sit up high.

                                                                            STEP FIVE - SIX
From the old box of bits I found some pieces that I liked to use a front and back bumpers, and then these cool front hockey stick looking things to hide the two pieces of wood and make it look more unified. Hopefully you've checked out the other tutorials / where to buy supply posts so you're not caught without anything to decorate the truck with. I like to add many small bits, sometimes looking at pictures of World War Two vechicles is a great help. The first shot is a rear view of the engine and bumper stuff.
 The final photo shows the addition of those side rails on the rear of the truck, I think this baby is ready for basecoat!


Tomorrow before the painting I'll post some pics of other Any How Town vehicles I've made to give you some other ideas. Happy Building
A.Shay Hahn

Building Popsicle Stick Vehicles STEP ONE


Okay, so you've hopefully built a couple of houses now, maybe a garage. well what are you going to park in that garage, or beside that house ? Today we'll build a popsicle stick truck or vehicle or some sort, I haven't decided what it will be yet, I just woke up.
STEP ONE get a small piece of wood maybe 3" long or so 1" deep max. ask an adult to help, or get your screw gun/ drill press and drill two 1/4" holes in the wood. Take two of your smallish round dowels and  thread them through the holes. DO NOT GLUE we're just looking for now. Why are we looking? Because we're going to do a "dry fit" so get your wheels and keep them in place. 
NOTE: Wooden wheels are hard to find, if you do find a place that sells them cheap buy tons. I was very lucky to be given a bunch a couple of years ago and I've saved a fortune. Michael's sells big ones and so does the Lee Valley Store downtown T.O, for this kind of set up (see above photo) you will need four wheels. I've built trucks with three just to save wheels.
Now keep the wheels on the sides and go get to your bin of bits and start gluing stuff on to make your vehicle. The wheels stay there because you don't want to make a mistake and glue something that will prevent you from attaching the wheels.
A.Shay Hahn
Friday, March 2, 2012

Bio Shock Infinite and other reasons to live

I am also coutning the days until BioShock Infinite is released, for the record, I am terrible at video games, comicly bad, so bad they should have a telethon for me. But I love design and the BioShock games are a triumph of desing. Here's a Big Daddy that I made awhile bag, probably my favourite conversion that I've ever done and of course if you go to my art blog "the mad craft shoppe" you can see many, many paintings of Deep Sea Divers that I've done over the years.
If you haven't checked out the BioShock Infinite trailers, screenshots etc. here's the link
cheers,
A.Shay Hahn

Red Skulls and Astronauts

I'm chomping at the bit and just can't wait until "Iron Sky" is released in Canada, if you don't know what it is you have got to go to the official site and watch the trailer.
A.Shay Hahn

Cliff Hoppers In Their Natural Habitat


The lights in the studio are driving me absolutely insane today everything has a stupid yellow tinge to it so since the weather is pretty mild I decided to go outside and get some shots of Cliff Hoppers.
And here's a little blurb from the thing that is also driving me insane, Any How Town Book One.

"Eaglet looked around and started to understand her surrounding, the high grasses and the piles of stone that filled the bowl weren’t just scattered around, there was an order to them, they were in large piles and the grasses grew around the edge of the stone piles and in amongst those same piles of stones, there were eggs.
                                                            She was sitting in a nest."
                                                                       -from Any How Town,
                                                                        Book One, "The New Town Bell".
                                                                   A.Shay Hahn
                                                               madcraftshoppe@live.com


Thursday, March 1, 2012

Building A Popsicle Stick Sewer and String Lights in Action!


So at top you can see a photo view of what I am shooting without the addition of string lights (or a back wall, see string light post below). The next shot is how I usually post diorama/model stuff here without any addition of a light source. You can see what I made and how, but it looks dull.
Again all the pieces you see in these pictures have been discussed in other posts (scroll away) and are all available at Dollar Stores, with the exception of the Luon bases and Star Wars folk.
Now you can see two photos using a dedicated light source, supplied by the string lights to add some drama to our diorama (I like that rhyme and I know you do to).
So the question is, What is going on under the city ? Well you're just going to have to wait until Book Two of the Any How Town series to find out!
cheers,
A.Shay Hahn